Tuesday, February 21, 2017

SQL Server Dynamic Data Masking SQL Server 2016

 This is one of the cool feature that introduced in SQL Server 2016, which can enable DBAs to mask data while database is in test\QA stage for testing. It limits the data exposure to the developers, testers and other unintended users, though it has it limitations and restrictions.

Types of Masking: 

Default Masking: Also known as full masking according to the data types of the designated fields.
  • For char, nchar, varchar, nvarchar, text, ntext uses XXXX or Fewer Xs depending on the field size.
  • For Date types uses 01.01.1900 00:00:00.0000000.
  • For bigint, bit, decimal, int, money, numeric, smallint, smallmoney, tinyint, float, real uses a zero value.
  • For Binary varbinary and image uses a Single byte of ASCII value 0.
Syntax:  Phone# varchar(12) MASKED WITH (FUNCTION = 'default()') NULL
               Alter syntax: ALTER COLUMN Gender ADD MASKED WITH (FUNCTION = 'default()')


Email Masking: This masking method which exposes the first letter of an email address and the constant suffix ".com", in the form of an email address.
e.g.: It Shows email addresses like aXXX@XXXX.com.
Syntax: Email varchar(100) MASKED WITH (FUNCTION = 'email()') NULL
              Alter syntax: ALTER COLUMN Email ADD MASKED WITH (FUNCTION = 'email()')


Random Masking: This masking function can be used on any numeric type to mask the original value with a random value within a specified range.
Syntax: Account_Number bigint MASKED WITH (FUNCTION = 'random([start range], [end range])')
              Alter syntax: ALTER COLUMN [Month] ADD MASKED WITH (FUNCTION = 'random(1, 12)')


Custom Masking: This masking method which exposes the first and last letters and adds a custom padding string in the middle.
Syntax: FirstName varchar(100) MASKED WITH (FUNCTION = 'partial(prefix,[padding],suffix)') NULL
            ALTER COLUMN [Phone Number] ADD MASKED WITH (FUNCTION = 'partial(1,"XXXXXXX",0)')

Masking Hands On:
-- Create a Demo database for Masking
CREATE DATABASE [Masking]
GO

-- Create a Demo table for masking
USE [Masking]
GO
SET ANSI_NULLS ON
GO
SET QUOTED_IDENTIFIER ON
GO
SET ANSI_PADDING ON
GO
CREATE TABLE [dbo].[Masking_Demo](
 [ID] [int] NOT NULL,
 [Name] [nvarchar](10) NULL,
 [DateOfBirth] [date] NULL,
 [AccNum] [numeric](18, 0) NULL,
 [Gender] [varchar](50) NULL,
 [EMailID] VARCHAR(50) NULL,
 [City] [nchar](10) NULL,
 [State] [nchar](10) NULL
) ON [PRIMARY]
GO

-- Inserting data into the above table
INSERT INTO dbo.Masking_Demo
        ( ID ,Name ,DateOfBirth ,AccNum ,Gender ,EMailID , City ,State)
VALUES  ( '1','Sri','1987-2-2','757676567','Male','Sri.anu@soandso.com', 'Florence','KY'),
        ( '2','Jer','1967-3-3','764900097','Male', 'Jer.cole@soandso.com', 'Hamilton','OH'),
  ( '3','Don','1990-4-4','780090909','Male','Don.sl@soandso.com', 'Newyork','NY')

-- Select Data from above table
SELECT * FROM [Masking].[dbo].[Masking_Demo]


Apply Masking to above table:
-- Create a Demo database for Masking
-- Alter table to mask each column with different masking functions
SET ANSI_PADDING OFF
GO

  Alter Table [Masking].[Masking_Demo] ALTER COLUMN [ID] ADD MASKED WITH (FUNCTION = 'default()')
  Alter Table [Masking].[Masking_Demo] ALTER COLUMN [Name] ADD MASKED WITH (FUNCTION = 'default()')
  Alter Table [Masking].[Masking_Demo] ALTER COLUMN [DateOfBirth] ADD MASKED WITH (FUNCTION = 'default()')
  Alter Table [Masking].[Masking_Demo] ALTER COLUMN [AccNum] ADD MASKED WITH (FUNCTION = 'random(1, 12000)')
  Alter Table [Masking].[Masking_Demo] ALTER COLUMN [Gender] ADD MASKED WITH (FUNCTION = 'default()')
  Alter Table [Masking].[Masking_Demo] ALTER COLUMN [EMailID] ADD MASKED WITH (FUNCTION = 'email()')
  Alter Table [Masking].[Masking_Demo] ALTER COLUMN [City] ADD MASKED WITH (FUNCTION = 'partial(3,"XXXX",2)')
  Alter Table [Masking].[Masking_Demo] ALTER COLUMN [State] ADD MASKED WITH (FUNCTION = 'partial(1,"XXXXXXX",0)')

-- Select Data from table after masking
SELECT * FROM [Masking].[dbo].[Masking_Demo]


Permissions:
  • Permissions required to create table with dynamic data mask are: CREATE TABLE and ALTER schema.
  • Adding, replacing, or removing the mask of a column, requires the ALTER ANY MASK permission and ALTER permission on the table.
  • SELECT permission on a table will view masked data only.
  • UNMASK permission are needed to retrieve unmasked data from the columns for which masking is defined. e.g.: GRANT UNMASK TO
  • The CONTROL permission on the database includes both the ALTER ANY MASK and UNMASK permission.

Best Practices and Common Use Cases:
  • Creating a mask on a column does not prevent updates to that column. So users receive masked data when querying the masked column, the same users can update the data if they have write permissions. A proper access control policy should still be used to limit update permissions.
  • Using SELECT INTO or INSERT INTO to copy data from a masked column into another table results in masked data in the target table.
  • Dynamic Data Masking is applied when running SQL Server Import and Export. A database containing masked columns will result in a backup file with masked data (assuming it is exported by a user without UNMASK privileges), and the imported database will contain statically masked data
Limitations and Restrictions:
A masking rule cannot be defined for the following column types:
  • Encrypted columns (Always Encrypted)
  • FILESTREAM
  • COLUMN_SET or a sparse column that is part of a column set.
  • A mask cannot be configured on a computed column, but if the computed column depends on a column with a MASK, then the computed column will return masked data.
  • A column with data masking cannot be a key for a FULLTEXT index.
  • For users without the UNMASK permission, the deprecated READTEXT, UPDATETEXT, and WRITETEXT statements do not function properly on a column configured for Dynamic Data Masking.

Security Note:
Bypassing masking using inference or brute-force techniques:
Dynamic Data Masking is designed to simplify application development by limiting data exposure in a set of pre-defined queries used by the application. While Dynamic Data Masking can also be useful to prevent accidental exposure of sensitive data when accessing a production database directly, it is important to note that unprivileged users with ad-hoc query permissions can apply techniques to gain access to the actual data. If there is a need to grant such ad-hoc access, Auditing should be used to monitor all database activity and mitigate this scenario.


Note to DBAs and Developers:
Don’t use the design mode to alter any column or table that is participating in Dynamic Data Masking, Design mode force the table to drop and recreate which results in masking to get removed.


Additional Readings:

Friday, January 6, 2017

Advantages of gMSA (Groups Managed Service Accounts) Over Domain accounts as SQL Server Service Accounts

Traditionally Domain Accounts are used as service accounts for SQL Server Services. 

To make them secure:

  • Administrators need to change the passwords on regular basis on each SQL Server.
  • Managing and tracking all the passwords is big headache.
  • And password reset does need a reboot so downtime. 
  • It will be overwhelming amount of work when there are 100s of SQL Servers exists in an environment. 
  • Chance of Human errors. 

Though most of the above process is automated into a single PowerShell script. But there always a chance of things can go wrong as these passwords are kept in human reach.

I have gone through concept of MSA (Managed Service accounts), but there are certain limitations while using them in clustered environment. I really like this concept of gMSAs (Groups Managed Service Accounts) which is extension to MSA. gMSA satisfying all the limitations with MSA. There is little bit of work involved for windows\AD folks in setting up gMSA in the environment, but DBAs just need to change them one time from domain User account to gMSA account. 


Below are few advantages that we can get from gMSA. 
  • It is very safe for SQL Servers to use gMSA as service accounts instead domain accounts.
  • It automates password management within active directory.
  • It generates very complex passwords and changed automatically as often as we want, default is 30 days.
  • The passwords are cryptographically random and 240 bytes long. Good thing is No One can use them for interactive (like RDP) logon so no headache of lock outs.
  • And service restart is not needed when account password gets reset so no Downtime.
  • By delegating the SPN registration permission to the gMSA, As account is not usable by human no problem of duplicate SPNs.
     
     We are planning to implement them in our environment, will share more of my experience once we have them in place. Hope this helps. 


Thursday, December 1, 2016

Monitor and Alert for the Long Running Agent Jobs on SQL Server

Stored Procedure that runs at every 1 Hr to identify the Long running jobs:

Use the DBA Specific database to create this stored procedure on your SQL Server where you are interested in finding the long running jobs on.   

Usp_LongRunningJobAlert:

USE [DBA_Specific_DB] -- Our DBA Specific DB for DBA related stuff
GO

SET ANSI_NULLS ON
GO
SET QUOTED_IDENTIFIER ON
GO

--*********************************************************************************************
--Author: SrikanthReddy Anugu
--Create Date: 
--Description: Indentifies and alerts the DBA Team for Long Running jobs which running longer than
--             @thresholdduration (We have to choose a value for @thresholdduration)
--    @thresholdduration is in minutes.
--    @thresholdduration is the time in minutes we use to decide whether a job long running or not
--    @thresholdduration -- we need to pass it when we run this procedure using a job
--*********************************************************************************************
CREATE PROCEDURE [dbo].[usp_LongRunningJobAlert] @thresholdduration INT
AS
-- Declaring the Temporary table to store all job details
DECLARE @currently_running_jobs TABLE (
    job_id UNIQUEIDENTIFIER NOT NULL
    ,last_run_date INT NOT NULL
    ,last_run_time INT NOT NULL
    ,next_run_date INT NOT NULL
    ,next_run_time INT NOT NULL
    ,next_run_schedule_id INT NOT NULL
    ,requested_to_run INT NOT NULL
    ,request_source INT NOT NULL
    ,request_source_id SYSNAME NULL
    ,running INT NOT NULL
    ,current_step INT NOT NULL
    ,current_retry_attempt INT NOT NULL
    ,job_state INT NOT NULL
    ) 
 
--loading\capturing details on jobs in to temporary table
INSERT INTO @currently_running_jobs
EXECUTE master.dbo.xp_sqlagent_enum_jobs 1,''
 
DECLARE @CurentRJob UNIQUEIDENTIFIER -- This variable is to read one job at a time from CurrentRunJobss and Process the IF stmt below
DECLARE CurrentRunJobs CURSOR FOR  
SELECT job_id FROM @currently_running_jobs
WHERE running = '1';  
OPEN CurrentRunJobs;  
FETCH NEXT FROM CurrentRunJobs INTO @CurentRJob  
WHILE @@FETCH_STATUS = 0  
BEGIN
  IF (SELECT DATEDIFF(MINUTE,MAX(run_requested_date),GETDATE()) FROM msdb..sysjobactivity WHERE  job_id=@CurentRJob) > @thresholdduration
  BEGIN
  DECLARE @TimeSpent INT
  DECLARE @JobName NVARCHAR(400)
  DECLARE @ServerName NVARCHAR(20)
  DECLARE @Mail_Subject NVARCHAR(400)
  DECLARE @Mail_Body NVARCHAR(400)
  SET @TimeSpent = (SELECT DATEDIFF(MINUTE,MAX(run_requested_date),GETDATE()) FROM msdb..sysjobactivity WHERE  job_id=@CurentRJob)
  SET @ServerName = (SELECT @@SERVERNAME)
  SET @JobName = (SELECT name FROM msdb..sysjobs WHERE job_id=@CurentRJob)
  SET @Mail_Subject= 'Long Running Job on ' + @ServerName
  SET @Mail_Body= 'The Job '+ @JobName + ' is running for more than '+ CAST(@thresholdduration AS NVARCHAR(100)) +' minutes. Time spent on current run is ' + CAST(@TimeSpent AS NVARCHAR(100)) +' Minutes.'
  EXEC msdb..sp_send_dbmail  
    @profile_name = 'DBA_Profile', -- Database mail profile  
   @recipients = 'DBA_Inbox@YourDomain.com',   
    @body = @Mail_Body,  
 @subject =  @Mail_Subject; 
  END
  FETCH NEXT FROM CurrentRunJobs INTO @CurentRJob 
  END
CLOSE CurrentRunJobs;  
DEALLOCATE CurrentRunJobs;  

GO
Job - [Long Running Jobs - Catch and Alert]: 

Create a job with below script to run the above created stored procedure at every one hour depending on your requirement.   
USE [DBA_Specific_DB]
GO
DECLARE @return_value int
EXEC @return_value = [dbo].[usp_LongRunningJobAlert]
  @thresholdduration = 360 -- Here @thresholdduration set to 360 minutes (6 hrs)
SELECT 'Return Value' = @return_value
GO

Hope it helps, please comment below if you have any questions.   

Thursday, October 20, 2016

Automate SSRS encryption key backup with Powershell script

Backup SSRS Encryption key with Powershell: 
I recently had a requirement to automate the SSRS encryption key automation. 
All you need to do is create below tables. Passwords are needed for each server to use while taking SSRS encryption key backup. 

  • A table with Server and Password (I used pwd) columns.
  • A table to keep track of history of Successful SSRS encryption key back up for each server. (you may include these columns Servername, Instance, FileName, EncryKeypwd, Backupdate, FileLocation)

Below is the script it will do the rest: All you need to do is create a job to run the script with schedule as you required. Please leave a comment if you have any questions. Hope it helps.

# $Computers grabs list of Servers with SSRS on them
$Computers = invoke-sqlcmd -ServerInstance "DBASQLInstanceName" -Database "DBAdb" -Query "SELECT [Server]  FROM [DBAdb].[dbo].[SSRS_ServerList_with_Pwds]"
 
#for each separate server in $Computers
foreach ($Computer in $Computers) 
{
$ComputerName=$Computer.Server

# Folder path to keep the backup file
$KeyFolder = "\\YOUR SHARE WHERE YOU WANT TO KEEP THE BACKUPS\SSRS\$ComputerName\"

# Try Catch Block for Catching the condition if the folder doesn't exists,…stop flow
$Error.Clear()
Try
    {
      # Delete files older than 30 days from above backup folder
      Get-ChildItem Microsoft.PowerShell.Core\FileSystem::$KeyFolder -ErrorAction Stop| where { $_.LastWriteTime -le ((Get-Date).AddDays(-30))} | remove-item 
    }

catch
    { 
       echo $_.Exception.GetType().FullName, $_.Exception.Message
       $From = "YourFromEmailID"
       $To = "YourToEmailID"
       $Subject = "SSRS Encryption Key Backup Failed for $computername"
       $Body = "$_.Exception.Message"
       $SMTPServer = "Your SMTP Server"
       $SMTPPort = "Your SMTP Port"
       Send-MailMessage -From $From -to $To -Subject $Subject `
       -Body $Body -SmtpServer $SMTPServer -port $SMTPPort
     }

# Query table to dig password and save it to variable KeyPassword
$SqlConnection = New-Object System.Data.SqlClient.SqlConnection
$SqlConnection.ConnectionString = "Server=DBASQLInstanceName;Database=DBAdb;Integrated Security=True"
$SqlCmd = New-Object System.Data.SqlClient.SqlCommand
$SqlCmd.CommandText = "SELECT pwd FROM DBAdb.dbo.SSRS_ServerList_with_Pwds where server='$ComputerName' "
$SqlCmd.Connection = $SqlConnection
$SqlAdapter = New-Object System.Data.SqlClient.SqlDataAdapter
$SqlAdapter.SelectCommand = $SqlCmd
$DataSet = New-Object System.Data.DataSet
$SqlAdapter.Fill($DataSet)
$SqlConnection.Close()
$KeyPassword=$DataSet.Tables[0].rows[0].pwd


# Checking for Password doesn't exsits or blank or NULL
If ([string]::IsNullOrWhiteSpace($KeyPassword)) 
      {
       Write-Host “Password for Encryption Key doesn't exsits on SSRS_ServerList_with_Pwds table for $computername"
       $From = "YourFromEmailID"
       $To = "YourToEmailID"
       $Subject = "SSRS Encryption Key Backup Failed for $computername"
       $Body = "No Password found on SSRS_ServerList_with_Pwds table for $computername "
       $SMTPServer = "Your SMTP Server"
       $SMTPPort = "Your SMTP Port"
       Send-MailMessage -From $From -to $To -Subject $Subject `
       -Body $Body -SmtpServer $SMTPServer -port $SMTPPort
       #$host.Exit()
      }

# if password is good proceed 
else {
# Try to take SSRS Encryption key backup
$Error.Clear()
Try
{

$TimeStamp = Get-Date -Format "-yyyyMMdd-HHmmss"

Get-WmiObject -Namespace "Root\Microsoft\SqlServer\ReportServer" -Class "__Namespace" -ComputerName $ComputerName |
    Select-Object -ExpandProperty Name |
    % {
        $NameSpaceRS = $_
        $InstanceName = $NameSpaceRS.SubString(3)
        $KeyFileName = Join-Path -Path $KeyFolder -ChildPath ($InstanceName + $Timestamp + ".snk")
        $SQLVersion = (Get-WmiObject -Namespace "Root\Microsoft\SqlServer\ReportServer\$($NameSpaceRS)" -Class "__Namespace" -ComputerName $ComputerName).Name
        $SSRSClass = Get-WmiObject -Namespace "Root\Microsoft\SqlServer\ReportServer\$($NameSpaceRS)\$($SQLVersion)\Admin" -Query "SELECT * FROM MSReportServer_ConfigurationSetting WHERE InstanceName='$($InstanceName)'" -ComputerName $ComputerName
        $Key = $SSRSClass.BackupEncryptionKey($KeyPassword)
        If ($Key.HRESULT -ne 0) {
            $Key.ExtendedErrors -join "`r`n" | Write-Error
        } Else {
            $Stream = [System.IO.File]::Create($KeyFileName, $Key.KeyFile.Length)
            $Stream.Write($Key.KeyFile, 0, $Key.KeyFile.Length)
            $Stream.Close()
        }
    }

# Update History table
$SqlConnection = New-Object System.Data.SqlClient.SqlConnection
$SqlConnection.ConnectionString = "Server=DBASQLInstanceName;Database=DBAdb;Integrated Security=True"
$SqlCmd = New-Object System.Data.SqlClient.SqlCommand
$SqlCmd.CommandText = "INSERT INTO dbo.SSRS_Encryption_Key_Bkp_History
        ( Servername, Instance, FileName, EncryKeypwd, Backupdate, FileLocation )
VALUES  ( '$ComputerName' , -- Servername - varchar(20)
          '$InstanceName' , -- Instance - varchar(20)
          '$KeyFileName' , -- FileName - varchar(40)
          '$KeyPassword' , -- EncryKeypwd - varchar(20)
          GETDATE(), -- Backupdate - datetime
          '$KeyFolder'  -- FileLocation - varchar(80)
        ) "
"Found Reporting Services in instance '$($InstanceName)' on $($ComputerName); will save key to '$($KeyFileName)' ..."
$SqlCmd.Connection = $SqlConnection
$SqlAdapter = New-Object System.Data.SqlClient.SqlDataAdapter
$SqlAdapter.SelectCommand = $SqlCmd
$DataSet = New-Object System.Data.DataSet
$SqlAdapter.Fill($DataSet)
$SqlConnection.Close() 

}

 catch
    { 
       echo $_.Exception.GetType().FullName, $_.Exception.Message
       $From = "YourFromEmailID"
       $To = "YourToEmailID"
       $Subject = "SSRS Encryption Key Backup Failed for $computername"
       $Body = "$_.Exception.Message"
       $SMTPServer = "Your SMTP Server"
       $SMTPPort = "Your SMTP Port"
       Send-MailMessage -From $From -to $To -Subject $Subject `
       -Body $Body -SmtpServer $SMTPServer -port $SMTPPort
     }
}
}

Wednesday, May 11, 2016

Securing the Microsoft SQL Server

I recently have been asked by an interviewer about how we are securing our SQL Server. SQL Server security is one of the important concern considering the importance of the data that it holds. It is very important keep any server secure from unauthorized access from internal and external hackers.  

To keep the data on SQL Server secured, we need to tighten the security both at windows server level and SQL Server level. 

At Windows Server Level: It is important to secure the operating system secured to make the system less vulnerable to the unauthorized gain of access.

Service packs and critical fixes for Windows: We need to make sure all the OS related latest security fixes\patches are properly installed, it is one of the best way to fill any holes on the security. Windows team need to roll out all the up to date releases. 

Configure a firewall: Configuring the firewalls will keep the systems behind an additional protective layer. We can setup the external facing servers in DMZ (demilitarized zone), it is a physical or logical sub-network that separates an internal local area network (LAN) from other untrusted networks, usually the Internet. This provides an additional layer of security to the LAN as it restricts the ability of hackers to directly access internal servers and data via the Internet. 

Restrict the Windows Administrator Access: As a best practice, we should limit the administrative access even Remote Desktop Service only to those who really require it. 


At SQL Server Level: Its time to do few SQL Server level tasks to add additional strength.

Install only the needed components: Install only needed SQL Server features\components. Though you installed all the features try to stop and disable unused features. The less installed components, the less security problems can occur.

Install service\Cumulative packs and critical fixes for SQL Server: It is important to implement all critical Service packs\fixes to ensure that there are no known holes on your security.

Disable the unused SQL Server protocols: though SQL server supports four different type of protocols, enable only the needed protocols and disable any unused protocols using the SQL Server configuration Manager. 

Don't use the default TCP Port 1433:  The default port number for SQL Server is well known to the hackers and other admins so there is fair chances hackers can target the 1433 port. Always change the default port number to something else. 

Restrict the access to the SQL Server configuration\Binaries and database files: There is chance to make changes to the database files to corrupt the databases or modifying the data using hexeditor so it important to restrict access to other users on the SQL Server related folders on local drives, It protects the file system to prevent unauthorized file deletion, copying. Restrict access to the SQL Server backup folders as well, which will protect the backup files from stealing.

Use Transparent Data Encryption: If you have an option to use the Transparent Data Encryption use it, It will provide an extra layer of protection in securing data, logs and backup. But TDE is only available with Enterprise and Datacenter editions. 

Disable the xp_cmdshell option: It is highly recommended to disable the xp_cmdshell stored procedure and do proper alerting\monitoring to get an alert when someone enables it. As members with sysadmin rights can enable it again.

Run the SQL Server Best Practice Analyzer to validate the installation: The Microsoft SQL Server 2012 Best Practice Analyzer can quickly identify if server is configured according to industry best practices or not.

User Account standards: It is important to restrict user account with required permissions only than granting them with much elevated permissions. 

Rename and disable the SA account: Where it is feasible change the SA password to some random GUID and disable it. Use undocumented sp_SetAutoSAPasswordAndDisable stored procedure to disable the SA account. This will prevent the attackers from trying to login with the default admin account.

Remove the BUILTIN\Administrators group: If you don't remove the BUILTIN\Administrators of the  from the SQL Server Logins, you are opening a window for Windows Admins to gain unauthorized access to the SQL Server. But in latest versions of SQL Server Microsoft has discontinued the BUILTIN\Administrators login. 

Avoid Mixed mode and Use Windows Authentication mode only: If possible try to use the windows authentication mode only. 

Use service accounts for applications: Try to create a dedicated (AD account) Service account for applications to use with only the required\limited permissions. We can use SQL Server logins with complex password. Try to avoid using the shared service accounts\logins for different applications. 

Configure service accounts with the least privileges: Do not grant more rights than required for SQL Server Service accounts.

The user privileges should be minimized: Try to assign the minimum sufficient rights to every user. It is a best practice to document any elevated user permission and request managerial approval.

All Logins (Windows\SQL Server) should have enforced with Password Policy: This is the best way to keep the weak and blank passwords away. 

Configure SQL Server login and Server role auditing: Setup auditing for both login failures and success. And get the list of logins with elevated permissions. The gathered audit log need to be reviewed on weekly\monthly basis. 

References:
https://www.pythian.com/blog/how-to-secure-microsoft-sql-server/
https://www.mssqltips.com/sqlservertip/3159/sql-server-security-checklist/

Monday, April 11, 2016

Configuration of Central Management Server and Registration of Servers using PowerShell Script

Central Management Server (CMS) is powerful tool for the DBAs, it is very useful when we try run a same script on group of servers to make a configuration changes or to list the databases from all the SQL Servers in your company or setting any database level setting or there are many cases where this CMS comes handy. 

Create and Configure Central Management Server: Choose a server to use as the CMS server. Open SSMS and click on registered Servers form View menu. 


It will open a Registered Servers pane which contains a node saying Central Management Servers, Right click on that Node and click on Register Central management Sever as below. 


It will open a pop window like below, enter the server that you use as CMS in the Server name then click test and save.


Now it is time to register the Servers on CMS to use the CMS power. We can register the servers manually but if you have lot of servers it will tedious job to register individual servers. Here we can use the power of Powers hell to bulk register servers.

Registering Servers using PowerShell: Create a table SERVERS with a column name as SERVERNAME on the CMS Server. And just load that table with all the SQL Server servers to be registered on the CMS as below.


Create Powershell script as below and name it as RegSvr.ps1 and note the location where you saved the script. Replace CMSSERVER with the CMS server that you chose, DATABASE is the DB name on the CMSSERVER where you have create the SERVERS table with the list of registered servers. And choose the DIRECTORY and SUBDIRECTORY names if you have different server groups for different purposes. Keep reset of the things as it is. 


Running the PowerShell Script: Connect to the CMS server and right on server and click the Start PowerShell. When you see the PowerShell window run SL ,then in the next line enter the name of the PowerShell script Regsvr.ps1 as in the below screen shot.


As it register, we can see the results as below..


We can see the registered servers as below, click on node and select new query to run a script against all the servers falling under that node. Shown as below. 


Attaching the PowerShell script here:


$cmsservers = invoke-sqlcmd -serverinstance 'CMSSERVER'-database 'DATABASE' -query "SELECT SERVERNAME FROM Servers"
cd 'SQLSERVER:\sqlregistration\Central Management Server Group\CMSSERVER\DIRECTORY\SUBDIRECTORY'
foreach ($server in $cmsservers)
{
$svrname = $server.serverName
$regsvrname = $svrname
if ($regsvrname -like "*\*")
{
$regsvrname = $regsvrname.replace("\", "%5C")
}
$svrname
new-item $regsvrname -itemtype registration -value "server= $regsvrname;integrated security=true"
}

I have used the post from SQLTIPS on registering servers on CMS, you can find the post here.
Thanks, Hope it helps. 

Sunday, April 10, 2016

SQL Server Isolation Levels

There are 5 different Isolation levels available in SQL Server. They are Read Committed, Read Uncommitted, Repeatable Read, Snapshot and Serializable.  There is another flavor of Isolation know as Read Committed Snapshot as well. Before we start learning about Isolation Levels, let's learn about ACID nature of SQL Server as well from here.  

Lets create a sample DB and table as below to play with different isolation levels:
USE MASTER
CREATE DATABASE IsolationDB
GO

USE IsolationDB
GO
CREATE TABLE Isotab
(
EmployeeID INT IDENTITY(1,1),
FirstName VARCHAR(256),
LastName varchar(256),
Gender varchar(10)
CONSTRAINT pk_Isotab PRIMARY KEY (EmployeeID)
)
GO

Read Committed: This is the default Isolation of the SQL Server, It means selects will only returns the committed data. The select transactions will issue a Shared lock on the requested data, and the Select statement will wait until any another transactions with exclusive locks that trying to modify the data are completed. Once the shared lock is captured other transactions trying to modify that data will request an exclusive lock and wait until this Read Committed transaction finishes.

Run both the queries:
Query 1:
USE IsolationDB
GO
TRUNCATE TABLE dbo.Isotab
GO
DBCC CHECKIDENT ('Isotab', RESEED,0)
GO
USE IsolationDB
GO
BEGIN TRAN
INSERT INTO DBO.Isotab (FirstName,LastName,Gender)
VALUES
('Don','Trump', 'M'),
('Hillary','Clinton', 'F'),
('Mike','Jackson', 'F')
WAITFOR DELAY '00:00:10'
ROLLBACK

Query 2:
USE IsolationDB
GO
SELECT * FROM dbo.Isotab
GO

You will see query 2 just spins and waits for query 1 to finish. You will see also a blocking on the session that running query 2 which gets blocked by session that running query 1. At the end Query 2 returns an empty set as the Query 1 rollbacks all the modifications.

Read Uncommitted: This is the lowest isolation level. Read uncommitted issues\requests no shared locks on the data, it allows the Selects to read data that is currently being modified in other transactions. It also allows other transactions to modify  data that Selects are reading. This where we can see some unexpected results in a variety of different ways. For example data returned by the select is partial as an update was running in another transaction causing some of rows to come back with the updated values and may be few records got deleted .

To see the effect of read uncommitted lets run Query 1 in one tab of SSMS and then quickly run Query 2 in another tab before Query 1 completes. We will see the Query 2 returns the data which is not committed on Query 1.

Query 1:
USE IsolationDB
GO
TRUNCATE TABLE dbo.Isotab
GO
DBCC CHECKIDENT ('Isotab', RESEED,0)
GO
USE IsolationDB
GO
BEGIN TRAN
INSERT INTO DBO.Isotab (FirstName,LastName,Gender)
VALUES
('Don','Trump', 'M'),
('Hillary','Clinton', 'F'),
('Mike','Jackson', 'F')
WAITFOR DELAY '00:00:10'
ROLLBACK

Query 2:
SET TRANSACTION ISOLATION LEVEL READ UNCOMMITTED
GO
USE IsolationDB
GO
SELECT * FROM dbo.Isotab
GO

From above we found that Query 2 will not wait for Query 1 to complete. This why Query 2 produced the the dirty data. Remember Query 1 rolls back all its changes however Query 2 has returned the data anyway, this is because it didn't wait for all the other transactions with exclusive locks on this data it just returned what was there at the time.

There is a shortcut for querying data with the read uncommitted isolation level with using the NOLOCK table hint as below, which will yield the same result as Query 2.
USE IsolationDB
GO
SELECT * FROM dbo.Isotab WITH (NOLOCK)
GO

Repeatable Read: This is similar to Read Committed but with the additional guarantee that if a transaction issues a same select twice it will get the same results both times. It does this by holding on to the shared locks it obtains on the records it reads until the end of the transaction. This means any transactions that try to modify these records are forced to wait for the read transaction to complete. But it will allow new records to get added, it does not stop new records being inserted so it is possible to get Phantom Reads with this isolation level.

Before we start testing this truncate our test table on our test database.


USE IsolationDB
GO
TRUNCATE TABLE dbo.Isotab
GO
DBCC CHECKIDENT ('Isotab', RESEED,0)
GO

Run the below Queries simultaneously in two sessions on SSMS.
Query 1:
SET TRANSACTION ISOLATION LEVEL REPEATABLE READ
USE IsolationDB
GO
BEGIN TRAN
SELECT * FROM dbo.Isotab
GO
WAITFOR DELAY '00:00:15'  
SELECT * FROM dbo.Isotab
COMMIT

Query 2:
USE IsolationDB
GO
INSERT INTO DBO.Isotab (FirstName,LastName,Gender)
VALUES
('Don','Trump', 'M'),
('Hillary','Clinton', 'F'),
('Mike','Jackson', 'M')

Below is the result set for Query 1 one select set is empty and another select set has 3 records. Query 2 with inserts completed as soon as it ran after Query 1 started and it wont wait for Query 1 to finish as Query 2 is not running Update or Deletes. 


Now Repeat the Query 1 and Query 2, but this time run a update Statement in Query 2.

Query 1:
SET TRANSACTION ISOLATION LEVEL REPEATABLE READ
USE IsolationDB
GO
BEGIN TRAN
SELECT * FROM dbo.Isotab
GO
WAITFOR DELAY '00:00:15'  
SELECT * FROM dbo.Isotab
COMMIT

Query 2:
USE IsolationDB
GO
UPDATE isotab
SET Gender='F' WHERE lastname='Trump'

Below is the result set for Query 1 , This time both select sets are equal with 3 records and same data. This time Query 2 with update is waited for Query 1 complete as Query 2 is not running Update. We will see same result if Query 2 running a delete. 


Serializable: This isolation level also eliminates Phantom Reads as well. This is similar to Read Committed but with the additional guarantee that if you issue the same select twice in a transaction you will get the same results both times. It does this by holding on to the shared locks it obtains on the records it reads until the end of the transaction, This means any transactions that try Insert\Delete\Update to these records are forced to wait for the read transaction to complete.

Before we start testing this truncate our test table on our test database.
USE IsolationDB
GO
TRUNCATE TABLE dbo.Isotab
GO
DBCC CHECKIDENT ('Isotab', RESEED,0)
GO

Run the below Queries simultaneously in two sessions on SSMS.
Query 1:
SET TRANSACTION ISOLATION LEVEL SERIALIZABLE
USE IsolationDB
GO
BEGIN TRAN
SELECT * FROM dbo.Isotab
GO
WAITFOR DELAY '00:00:15'  
SELECT * FROM dbo.Isotab
COMMIT

Query 2:
USE IsolationDB
GO
INSERT INTO DBO.Isotab (FirstName,LastName,Gender)
VALUES
('Don','Trump', 'M'),
('Hillary','Clinton', 'F'),
('Mike','Jackson', 'M')

Below is the result set for Query 1, both select sets are with zero records. The Query 2 with Insert waited for Query 1 to complete unlike Repeatable Read which allows Inserts. Query 2 will finish and inserts records after Query 1 is finished. We will see same result for Query 2 running an update or Insert.


Snapshot: This provides the same guarantees as Serializable. The difference is the way it works. It works entirely different than the Serializable.  When we use the Snapshot it doesn't block other queries from Inserting or Updating or Deleting the data touched by the snapshot transaction unlike Serializable. Instead Snapshot uses row versioning when the data is changed the old version is kept in tempdb so existing transactions will see the version without the change. When all transactions that started before the changes are complete the previous row version is removed from tempdb. This means that even if another transaction has made changes you will always get the same results as you did the first time in that transaction.

The positive side of Snaphot isolation is not blocking any transactions that try modifying the data while running the select transaction but it uses extra resources on the SQL Server to hold multiple versions of your changes in the tempdb.

To use the snapshot isolation level we need to enable it on the database by running the following command. 


ALTER DATABASE IsolationDB  
SET ALLOW_SNAPSHOT_ISOLATION ON  

Or we can enable it from Database properties:


Before we start testing this truncate our test table on our test database.
USE IsolationDB
GO
TRUNCATE TABLE dbo.Isotab
GO
DBCC CHECKIDENT ('Isotab', RESEED,0)
GO

Query 1:
SET TRANSACTION ISOLATION LEVEL SNAPSHOT
USE IsolationDB
GO
BEGIN TRAN
SELECT * FROM dbo.Isotab
GO
WAITFOR DELAY '00:00:10'  
SELECT * FROM dbo.Isotab
COMMIT 

Query 2:
USE IsolationDB
GO
INSERT INTO DBO.Isotab (FirstName,LastName,Gender)
VALUES
('Don','Trump', 'M'),
('Hillary','Clinton', 'F'),
('Mike','Jackson', 'M')

Below is the result set for Query 1, both select sets are with zero records. The Query 2 with Insert Doesn't waited for Query 1 to complete unlike Serializable which makes insert\delete\updates to wait. Query 2 finished and inserted records before Query 1 is finished. We will see same result for Query 2 running an update or Delete.


Note: Even though we have enabled the Snapshot isolation at database level we still need to use the SET TRANSACTION ISOLATION LEVEL SNAPSHOT to use the Snapshot Isolation, other wise it will use the Default Isolation (Read Committed). And we can use any Isolation on session base though SNAPSHOT Isolation is enabled at database level.

In any Isolation (Read Committed, Read Uncommitted, Repeatable Read and Serializable) the Update\Delete transaction which is issued later will wait until the prior Update\Delete transaction to complete and later Transaction will end as successful transaction as soon as prior transaction completes. 

But In Snapshot Isolation Conflict will occur and later transaction will end with failure as soon as the the prior transaction complete. Lets test this.

Before we start testing this truncate our test table on our test database and set DB Isolation to Snapshot:
USE IsolationDB
GO
TRUNCATE TABLE dbo.Isotab
GO
DBCC CHECKIDENT ('Isotab', RESEED,0)
GO
---- insert some test data
INSERT INTO DBO.Isotab (FirstName,LastName,Gender)
VALUES
('Don','Trump', 'M'),
('Hillary','Clinton', 'F'),
('Mike','Jackson', 'F')
---- Change DB to use Snapshot Isolation
ALTER DATABASE IsolationDB SET ALLOW_SNAPSHOT_ISOLATION ON

Query 1:
USE IsolationDB
SET TRANSACTION ISOLATION LEVEL SNAPSHOT
BEGIN TRAN
UPDATE Isotab
SET Gender='Female' WHERE LastName='Trump'
WAITFOR DELAY '00:00:15'
COMMIT

Query 2:
USE IsolationDB
SET TRANSACTION ISOLATION LEVEL SNAPSHOT
BEGIN TRAN
UPDATE Isotab
SET Gender='Male' WHERE LastName='Trump'
COMMIT

Now first run Query 1 which try changes Trump gender to Female and it waits for 15 secs before it commit. Meanwhile we have figured out the mistake and tried to change it to Male using the Query 2. Query 2 will wait until the Query 1 finishes and fails to change it to male. And the Query 2 error looks like below. And it doesn't happen in any other Isolation Level. 


Read Committed Snapshot: To rectify this Update Conflict issue with Snapshot Isolation we have an option which is Enabling Is_Read_Committed_Snapshot_On. It works more like Read_Committed while modifications and works like Snapshot while selects. But there few differences.

Before we start testing this truncate our test table on our test database and set DB Isolation to Read_Committed_Snapshot:


USE IsolationDB
GO
TRUNCATE TABLE dbo.Isotab
GO
DBCC CHECKIDENT ('Isotab', RESEED,0)
GO
---- insert some test data
BEGIN TRAN
INSERT INTO DBO.Isotab (FirstName,LastName,Gender)
VALUES
('Don','Trump', 'M'),
('Hillary','Clinton', 'F'),
('Mike','Jackson', 'F')
COMMIT
---- Change DB to use Snapshot Isolation
ALTER DATABASE [IsolationDB] SET READ_COMMITTED_SNAPSHOT ON WITH NO_WAIT
GO

Query 1:
USE IsolationDB
SET TRANSACTION ISOLATION LEVEL READ COMMITTED
BEGIN TRAN
UPDATE Isotab
SET Gender='Female' WHERE LastName='Trump'
WAITFOR DELAY '00:00:15'
COMMIT 

Query 2:
USE IsolationDB
SET TRANSACTION ISOLATION LEVEL READ COMMITTED
BEGIN TRAN
UPDATE Isotab
SET Gender='Male' WHERE LastName='Trump'
COMMIT

Now first run Query 1 which try changes Trump gender to Female and it waits for 15 secs before it commit. Meanwhile we have figured out the mistake and tried to change it to Male using the Query 2. Query 2 will wait until the Query 1 finishes and changes it back to male.  Below is the result.


Key Differences between Snapshot and Read Committed Snapshot are Snapshot isolation provides Transaction Level Read Consistency where as Read Committed Snapshot Isolation provide Statement Level Read Consistency And you can see a Nice Video on these two Isolation Levels here (Venkat has given a great and simple presentation on this). 

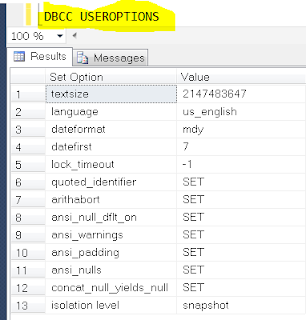
We can check the Isolation Level that we are using at session level by running the DBCC USEROPTIONS command.


Thanks
Hope it helps some one.